How to install and configure Remote Desktop Gateway Window Server 2008 R2
Topics covered in this lesson
include the following:
Installing
and Configuring the Terminal Services Gateway Role Service.
We need to install the Remote Desktop Gateway Role Service from Server
Manager. A basic RD Gateway connection policy also needs to be created, which
allowed incoming connections to connect to any computer on the network.
We used the existing SSL Certificate that was created in the RRAS SSTP Lab.
This certificate is important because the Terminal Server traffic is encrypted
with SSL.
Connecting
to a computer using Terminal Services Gateway:
Within the “Remote Desktop
Connection client”, an option needs to be set in the “Advanced” tab. It is important that an FQDN be used, as it needs to
match the name on the SSL Certificate used on the RD Gateway.
Examining
the Event Logs to diagnose potential problems:
The event logs for Terminal Services Gateway will summarize why a client
machine was unable to connect. This is a very useful piece of information to
gather for troubleshooting.
Install RD Gateway Role service:
- Open Server Manager. To open
Server Manager, click Start, point to Administrative Tools,
and then click Server Manager.
- Under the Roles Summary
heading, click Add Roles.

- In the Add Roles Wizard, if the Before
You Begin page appears, click Next.
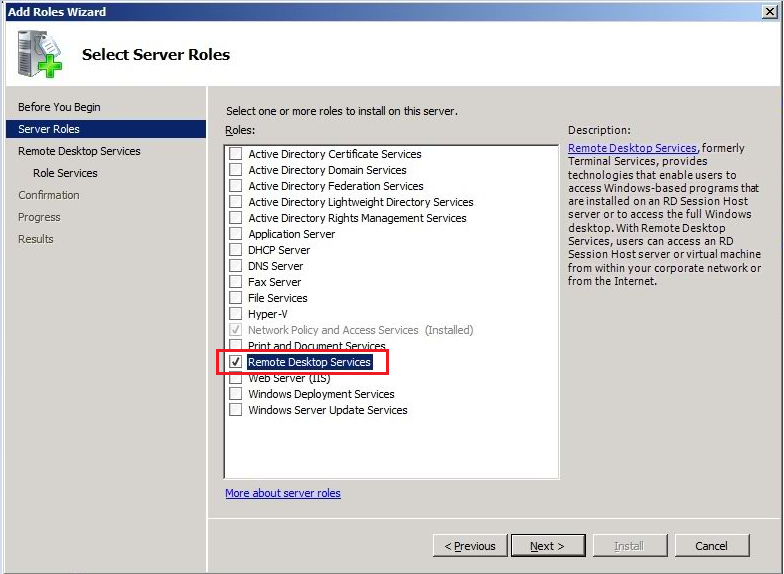
- On the Select Server Roles
page, under roles, select the Remote Desktop Services check box,
and then click Next.
- On the Remote Desktop Services
page, click Next.
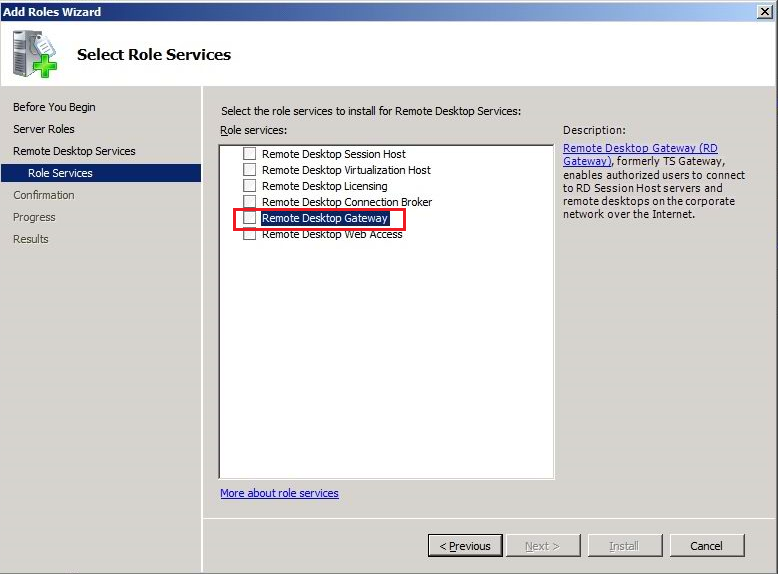
- On the Select Role Services
page, select the Remote Desktop Gateway check box.
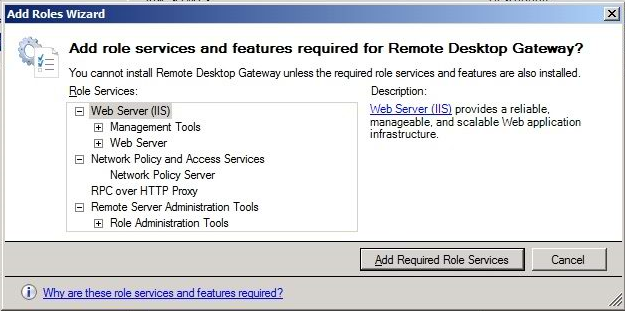
- If prompted to specify whether you
want to install the additional role services required for Remote Desktop
Gateway, click Add Required Role Services.
- On the Select Role Services
page, click Next.
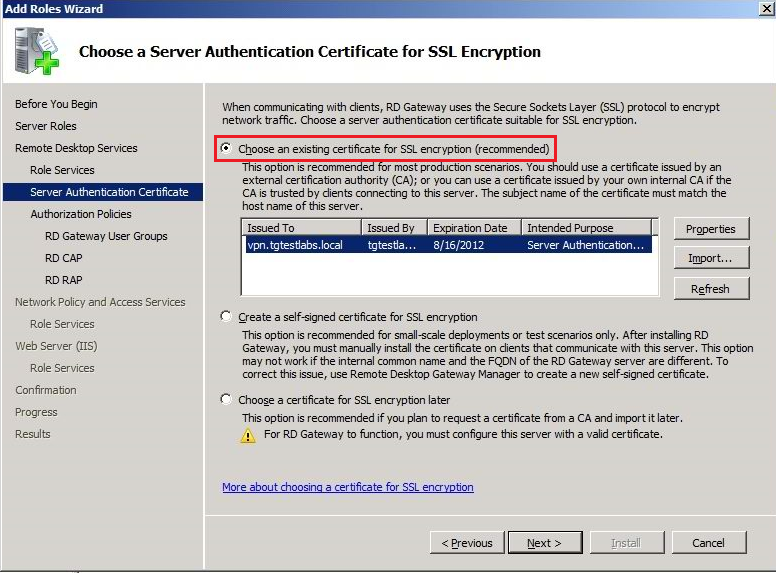
- On the Choose a Server
Authentication Certificate for SSL Encryption page, select Choose
an existing certificate for SSL encryption (recommended), and then
click Next.
- On the Create Authorization
Policies for RD Gateway page, select Now, and then click Next.
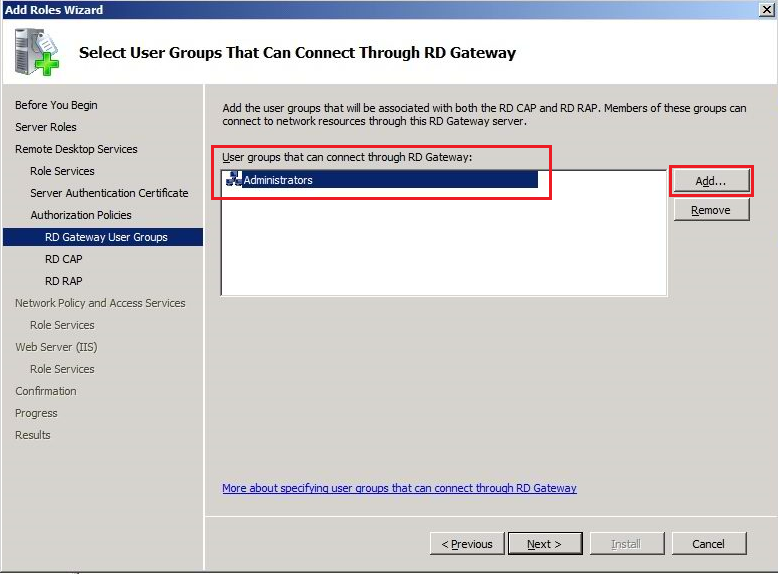
1.
On the Select User Groups That Can Connect Through RD Gateway page,
click Add. In the Select Groups dialog box, specify Administrators,
and then click OK to close the Select Groups dialog box. Click Next.
2.
On the Create an RD CAP for RD Gateway page, enter the name TS_CAP_01
for the Remote Desktop connection authorization policy (RD CAP), select Password,
and then click Next.

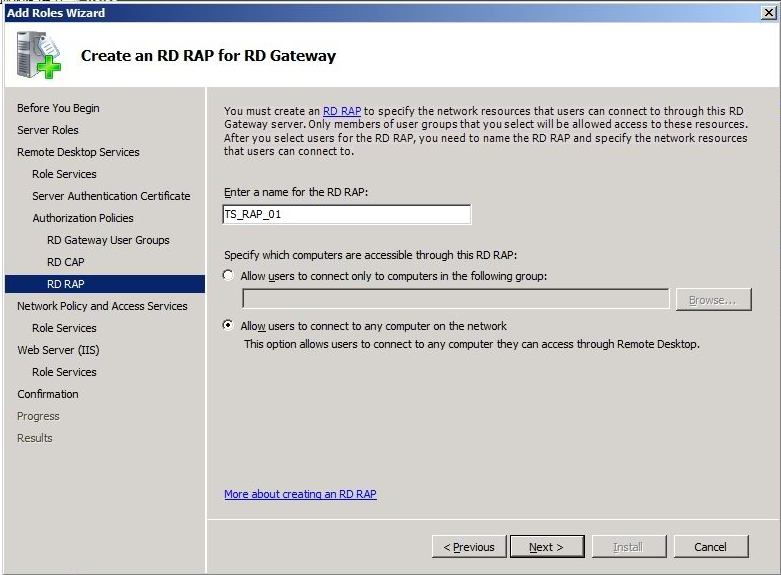
3.
On the Create an RD RAP for RD Gateway page, enter the name TS_RAP_01
for the Remote Desktop resource authorization policy (RD RAP), and then select Allow
users to connect to any computer on the network. Click Next.
- On the Network Policy and
Access Services page (which appears if this role service is not
already installed), review the summary information, and then click Next.
- On the Select Role Services
page, verify that Network Policy Server is selected, and then click
Next.
- On the Web Server (IIS)
page (which appears if this role service is not already installed), review
the summary information, and then click Next.
- On the Select Role Services
page, accept the default selections for Web Server (IIS), and then
click Next.
- On the Confirm Installation
Selections page, verify that the following role services will be
installed:
·
Remote Desktop Services\RD Gateway
·
Network Policy and Access Services\Network Policy Server
·
Web Server (IIS)
·
RPC over HTTP Proxy
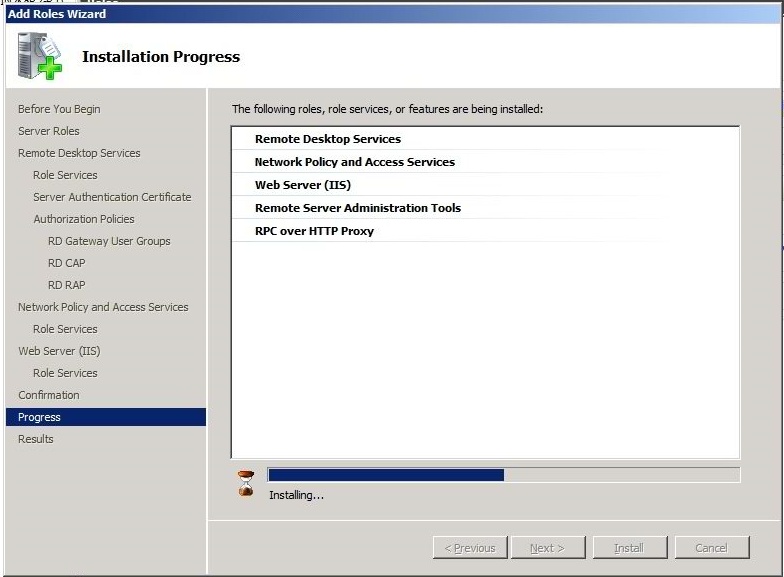

On the Installation Progress page, installation progress will be
noted.
On the Installation Results page, confirm that installation for
these roles, role services, and features was successful, and then click Close.
Configure server to allow incoming TS connection:
In our Lab, we configured
the server DC2 which is a 2008R2
server for the incoming TS connection. Follow the below steps to configure the
same.
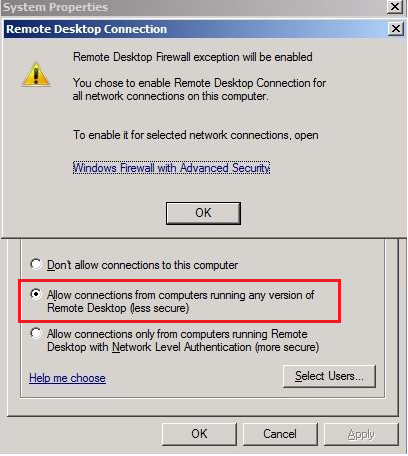
1. Open
system properties, by clicking Start, Run and type sysdm.cpl (same can be opened by right clicking My Computer and click Properties [Advanced System settings in case of Win 7 or above])
2. Click
on tab Remote and select Allow connections from computers running
any version of Remote Desktop (Less Secure) and click OK twice.

support@techyglobal.com
www.techyglobal.com
No comments:
Post a Comment